
Mass Blind Server-Side Testing Setup For Bug Bounty
Vulnerabilities that take place behind the scenes of an application’s operation are known as Out-Of-Bound (OOB) issues. It is a kind of vulnerability that does affect the server, but you cannot see the outcome unless you send the data to another server. Usually, it is critical or high-severity findings, that could lead to large bounties! There are some cases when you want to have your server to test for those vulnerabilities. For example – the target website could have certain security in place, to block known servers like app.interactsh.com or Burp Suite’s collaborator. In this article, we will discover how it’s possible to build your own OOB server. It is a must-have thing to do if you want to stand out in the bug bounty scene!

Types of Out-Of-Band Vulnerabilities
There are multiple vulnerability classes which could be used for OOB testing:
- SQL Injection (SQLi) – the attacker triggers a database query that sends results to a server they control.
- Remote Code Execution (RCE) – malicious code will be executed that interacts with external systems.
- XML External Entity (XXE) Attacks – XML input processing that references external entities.
- Server-Side Request Forgery (SSRF) – allows an attacker to force the server to make requests to unintended locations or services.
- Blind Cross-Site Scripting (BXSS) – I have already covered these before. Make sure to check the BXSS server setup and BXSS Mass Hunting articles.
As you can see, these are pretty serious vulnerabilities. In this post, we will focus on building a server for server-side vuln types. For this tutorial, I will use interactsh with a custom domain from 123-reg.co.uk and DigitalOcean as a VPS provider.
Picking Up Domain
If you read my BXSS Initial Setup article, you might know that I highly recommend using short domain names. Even for testing those OOB server-side issues, I highly advise using 6 character domains, since there will be cases where payload size is limited. For the Top Level Domain – use 2 letter domain (in, uk, lv, lt, io), and for 2nd level domain use 3 characters. The www.123-reg.co.uk is a good domain provider since it is very cheap for uk TLD. Let’s use it as an example here.
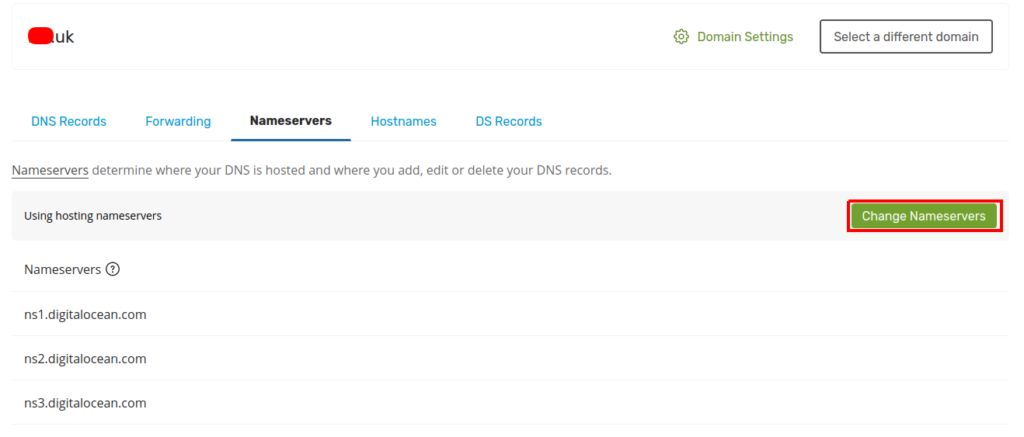
After purchasing the domain, head to https://account.123-reg.co.uk/products and click on DNS:

Next, click on Change Nameservers, select I’ll use my own nameservers, and add DO nameservers (ns1.digitalocean.com, ns2.digitalocean.com, ns3.digitalocean.com):
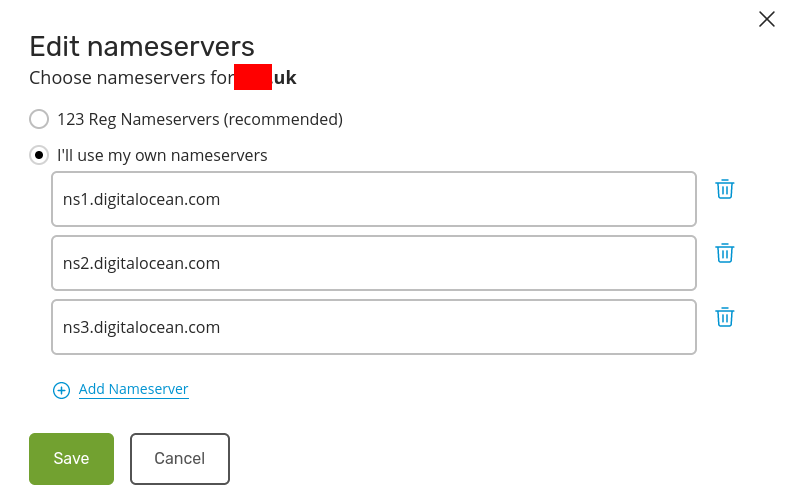
Click on Save and Continue and your domain will be pointing to the DigitalOcean.
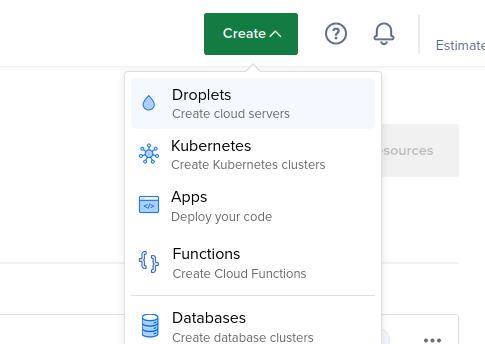
Setting Up VPS
For Out-Of-Bound VPS, use the DigitalOcean. Once again, you could use my link, to get some free $200 credits!
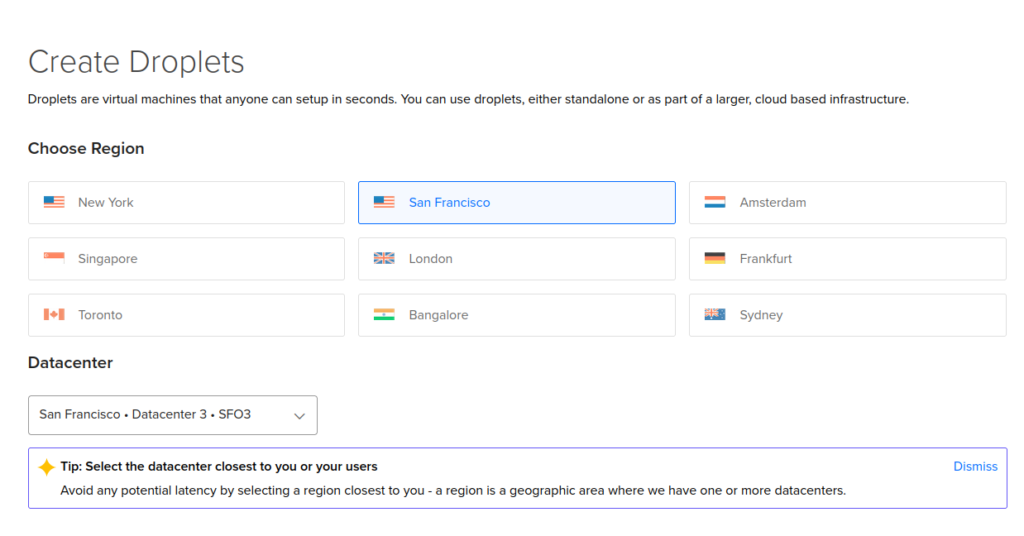
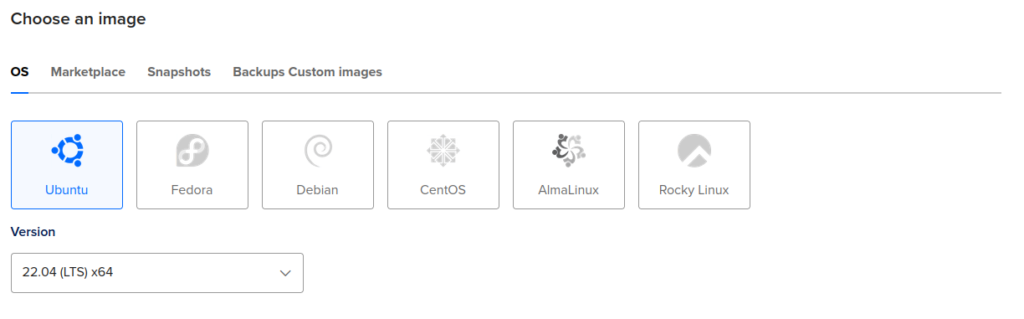
To interactsh-server work reliably, I recommend the Host with at least 2 GB of RAM. Follow those steps on DO for server setup:

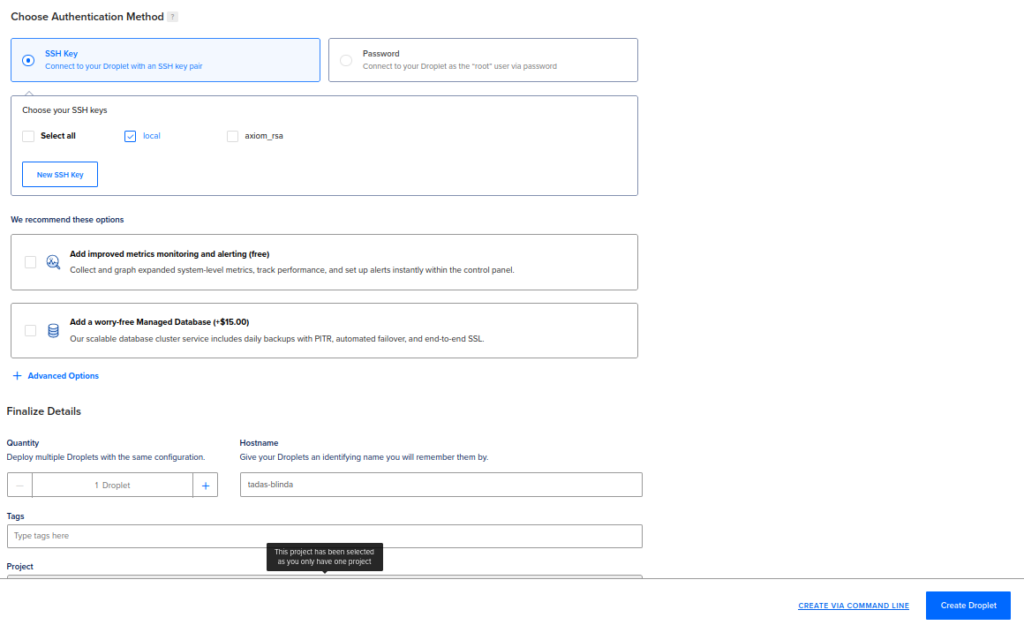
Next, add your SSH key, give a name for your droplet, and click on the Create Droplet button down below:
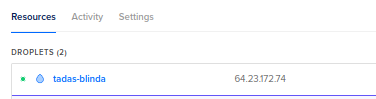
It will take up to a couple of minutes for the droplet to fully initialize. Once it finishes, click on the IP to copy:
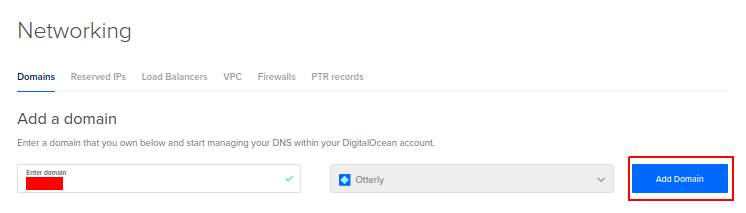
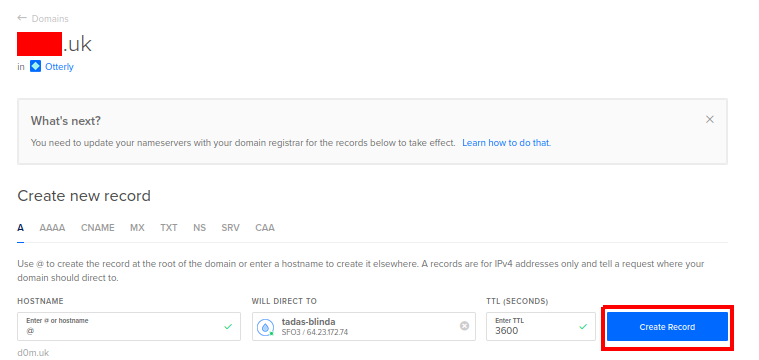
Next, go to networking->domains and click on Add Domain:
Add the copied IP as the A DNS record and click on Create Record:
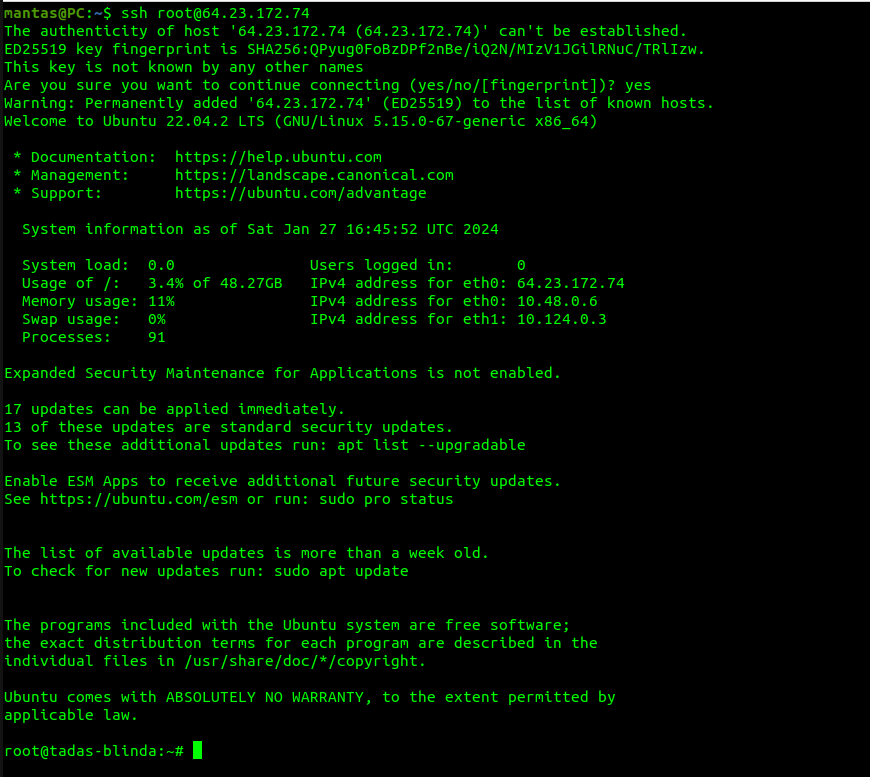
Now you will be finally ready to connect to the server via SSH:
Installing interactsh-server
This OOB server runs on go language, so you will need to install golang first:
wget https://go.dev/dl/go1.21.6.linux-amd64.tar.gztar -C /usr/local -xzf go1.21.6.linux-amd64.tar.gzrm go1.21.6.linux-amd64.tar.gz
Edit the ~/.bashrc file using nano ~/.bashrc and add these 3 lines to the end:
export GOROOT=/usr/local/go
export GOPATH=$HOME/go
export PATH=$GOPATH/bin:$GOROOT/bin:$HOME/.local/bin:$PATH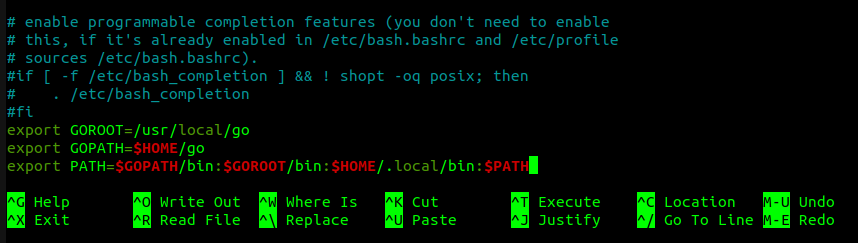
Finally, enable golang in the current terminal using source ~/.bashrc command.
Next, install interactsh-server:
go install -v github.com/projectdiscovery/interactsh/cmd/interactsh-server@latestTo work properly with the selected domain, I suggest generating certificates:
openssl req -newkey rsa:2048 -nodes -keyout domain.key -x509 -days 365 -out domain.crt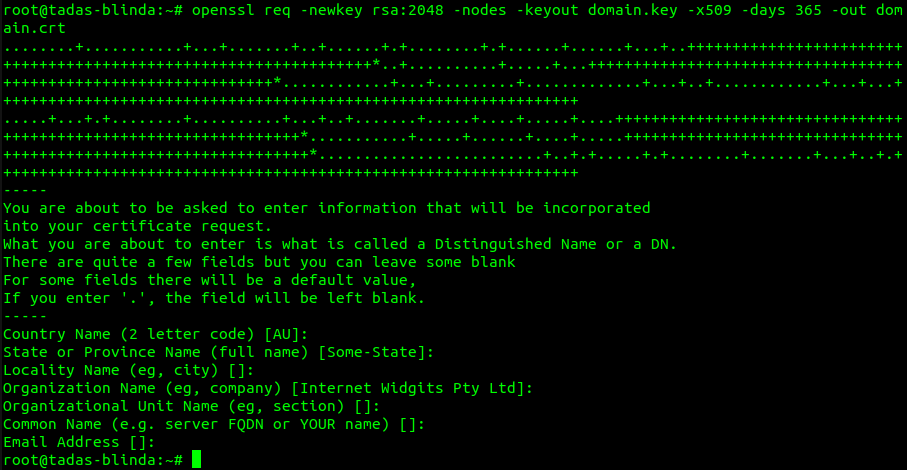
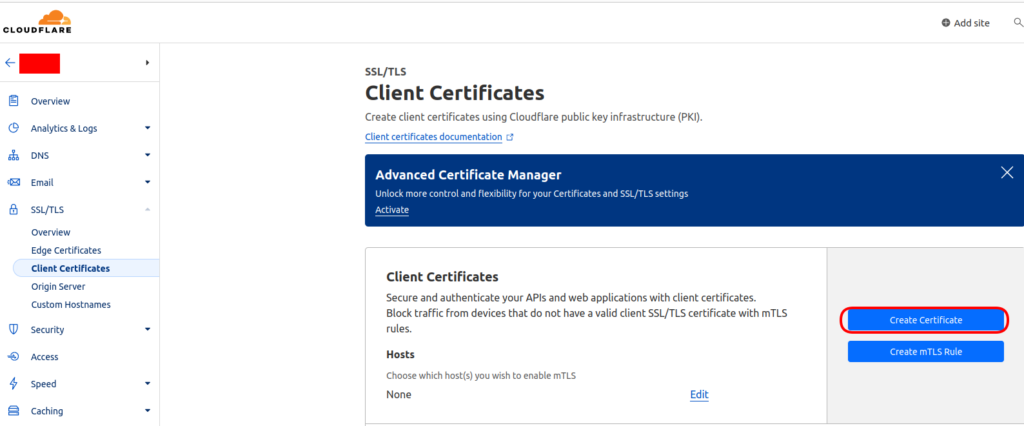
Alternatively, you could also use Cloudflare to generate an SSL certificate for your website:
At this point, you will be almost ready to run the OOB server, but you will also need some ports to be opened. For this case, I would like to use ufw utility:
ufw allow 21,22,25,53,80,389,443,445,465,587/tcpufw allow 53/udpufw enable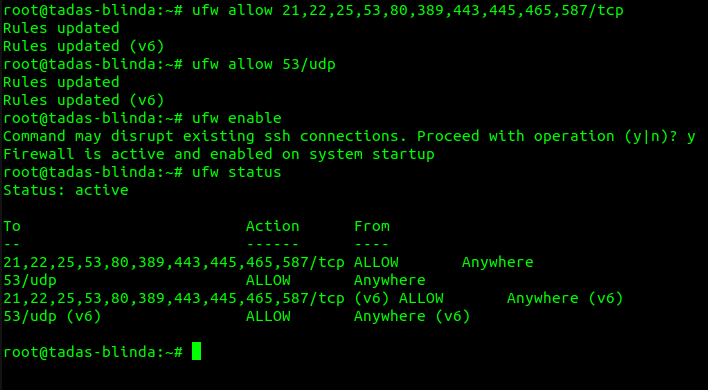
Finally, you can simply run interactsh-server:
interactsh-server -d <domain> -cert domain.crt -privkey domain.key -t <token> -wc -hd ./payloads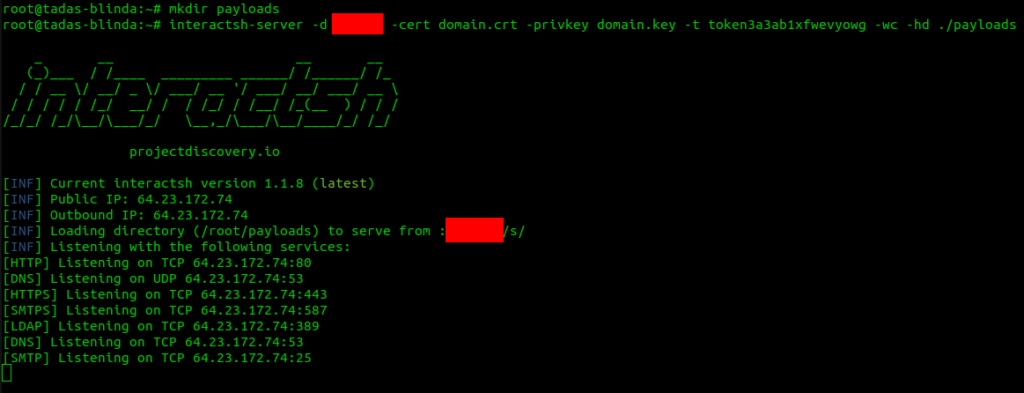
Note that I have created the payloads directory, where I can store some extra scripts, for example for XXE or XSS. Also, use your own domain with the -d flag. The -t flag is where you specify the token, which will be used when you want to connect to this server from a local machine. The -wc flag is for allowing wildcard domains.
Also to run this in the background – add & character at the end and if you want to stop the server use this command:
killall interactsh-server
Accessing OOB Server
Now, while your server is running, you will want to access it at some point. There are 2 ways to do it: 1# using CLI tool – interactsh-client or 2# using web interface – interactsh-web. Let’s explore both ways.
1# Using interactsh-client
Download the client to your local machine (keeping in mind that you have golang installed):
go install -v github.com/projectdiscovery/interactsh/cmd/interactsh-client@latestTo simply access your server, you will need to specify the domain and the token:
interactsh-client -s <domain> -t <token>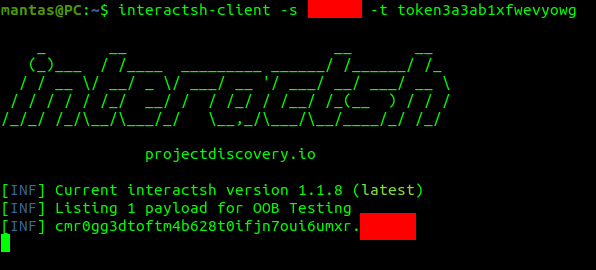
To simply test if it works properly, I have opened another terminal and used the curl command:
curl '<domain>'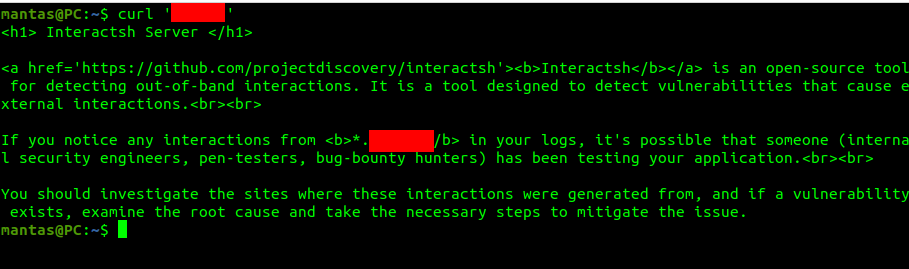

2# Using interactsh-web
To simply use a web interface to access the OOB server, you going to need docker installed in your local system. Run these commands:
docker pull projectdiscovery/interactsh-webdocker run -it -p 3000:3000 projectdiscovery/interactsh-webNow go to the localhost:3000 to access the web interface. You could add your own host as well:
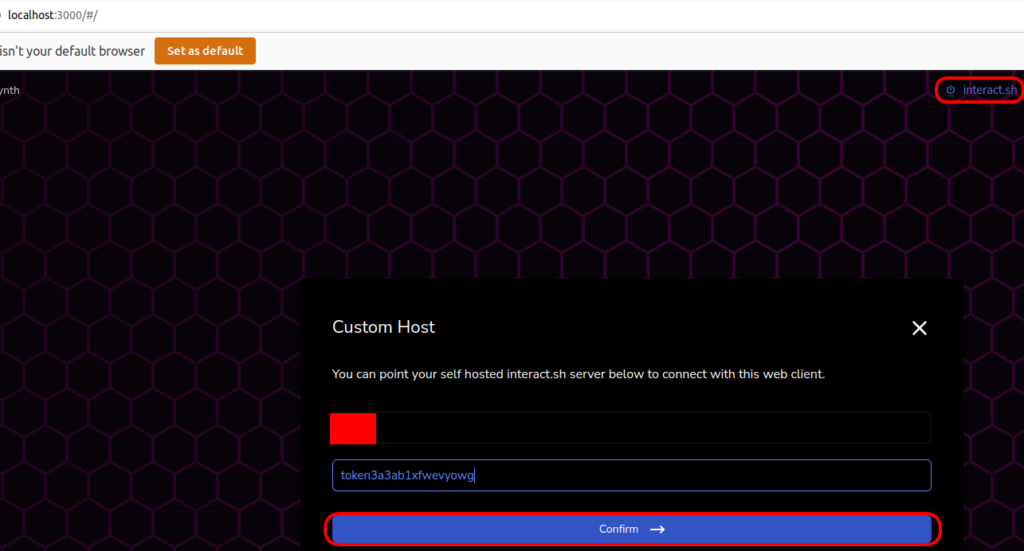

Note: Sometimes there could be issues due to CORS while adding your domain. In cases like these, I suggest using 1st option.
Adding Notifications To The Discord Server
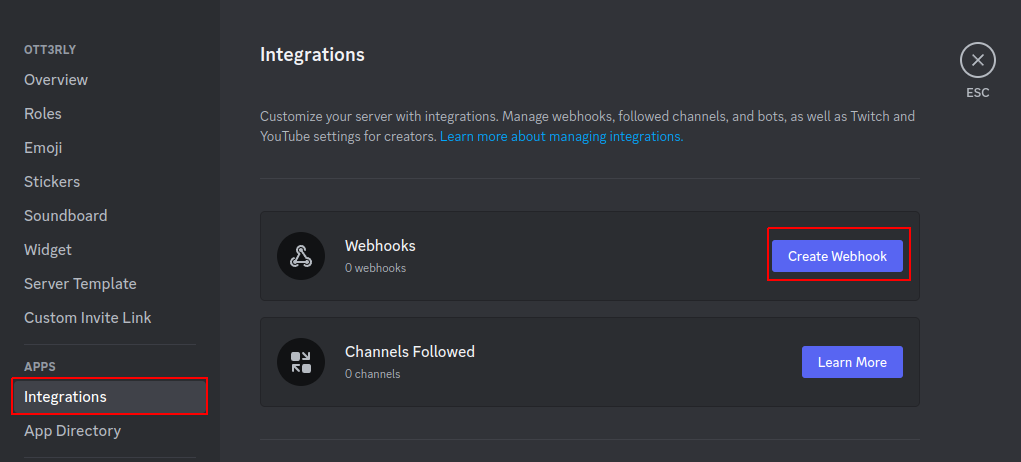
This part is pretty important if you are taking OOB testing seriously. Discord Server is a good thing to have if you are collaborating with someone or just want to get notified ASAP. There is an article that covers how to create your own Discord Server. Alternatively, you could join my Discord, but keep in mind that I don’t share my OOB channels with everyone. You will need to set up the webhook first, in order to listen to the incoming notifications:
Click on your server avatar, and click on Server Settings. Next, head to the APPS->Integrations menu item and click on Create Webhook:
You can choose the webhook avatar image, which channel it will post to, and its name. I will choose a bug-bounty channel for this example:
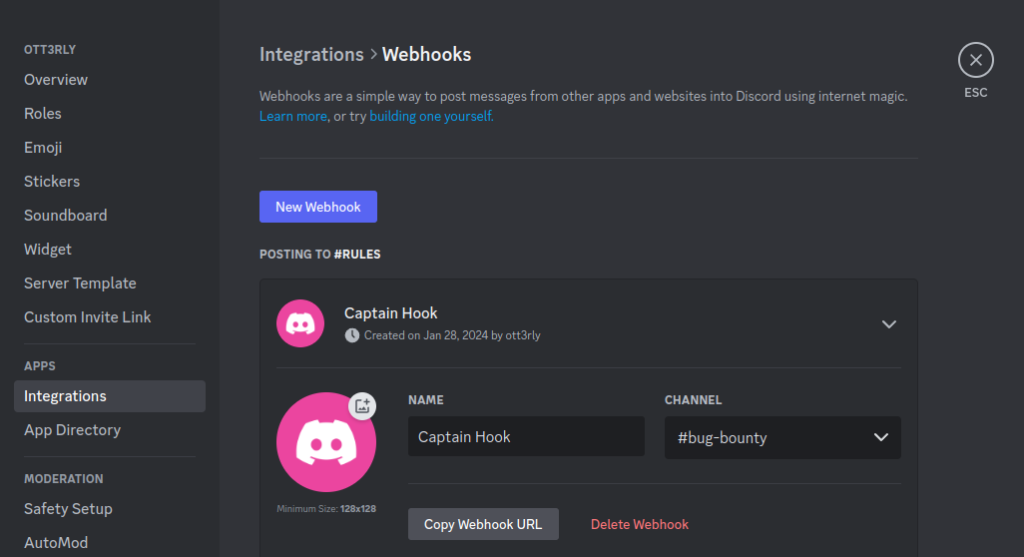
Copy the Webhook URL and head back into VPS. If you have interactsh-server running, kill the process with killall interactsh-server command. Next, I advise you to install interactsh-client and notify:
go install -v github.com/projectdiscovery/interactsh/cmd/interactsh-client@latestgo install -v github.com/projectdiscovery/notify/cmd/notify@latestOnce all required dependencies are installed, you will want to create a default notify configuration file and edit it:
mkdir $HOME/.config/notify && nano $HOME/.config/notify/provider-config.yamldiscord:
- id: "oob"
discord_channel: "<channel>"
discord_username: "<bot name>"
discord_format: "{{data}}"
discord_webhook_url: "<webhook>"
Test if the notify configuration and Discord webhook are working:
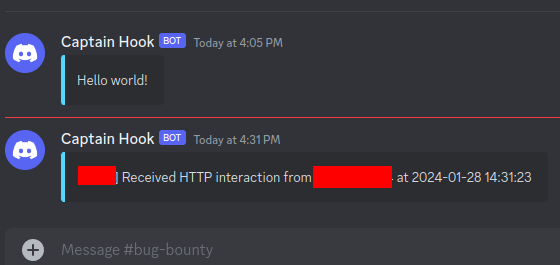
echo "Hello world!" | notify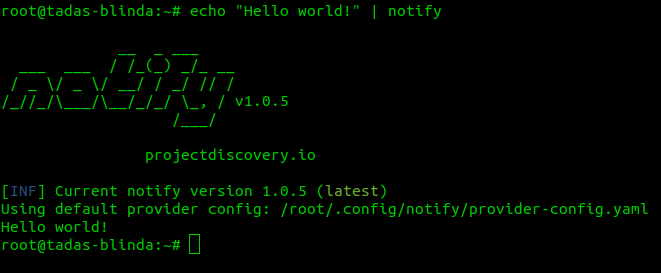

Now you want the interactsh-client running 24/7 together with notify:
interactsh-client -s <domain> -t <token> -n 10 -o interactsh.out | notify &Lastly, test it out from a local machine by using curl <domain> again:
Before you go…
As you can see, setting up your own OOB server is pretty much a straightforward process. It is a must-do if you want to not miss on testing special types of vulnerabilities. For testing the payloads, you could check my OOB wordlist. Make sure to replace all domain names with your own!
If you find this information useful, please share this article on your social media, I will greatly appreciate it! I am active on Twitter, check out some content I post there daily! If you are interested in video content, check my YouTube. Also, if you want to reach me personally, you can visit my Discord server. Cheers!