
Hunting Blind XSS on the Large Scale — Initial Setup
The Blind Cross-Site Scripting is a pretty serious client-side vulnerability with serious consequences. This type of vulnerability enables attackers to insert harmful scripts capable of stealing sensitive data, taking over user sessions, defacing websites, or initiating more complex attacks. Unlike typical stored XSS vulnerabilities, Blind XSS could be executed at any time, usually impacting admin or employee interfaces! Given the elevated privileges of admin accounts, which include access to extensive functions and sensitive information, the exploitation of Blind XSS can lead to substantial financial losses and data breaches. In this article, I will cover how you can set up the own Blind XSS framework so you could be ready to hunt on the mass scale.
If you are interested in other Mass Hunting Techniques, check my other articles for this topic.
Blind XSS Tools
bXSS — one of the older frameworks, Blind XSS. It is pretty outdated, but still works!
ezXSS — an easy way for penetration testers and bug bounty hunters to test (blind) Cross Site Scripting. Has some unique features, like adding multiple users, unique dashboard and more.
XSSHunter Express — A lightweight version of XSS Hunter, designed for quick deployment and ease of use. Pretty quick to setup, mostly used now days by many hunters. I will use this framework in this article.
Prerequisites for BXSS Framework
Before starting to use the XSSHunter Express, there are a couple of things required to do. You’re going to need to have a domain and a VPS server. Don’t worry, I will cover the steps on how you could achieve this.
Purchasing the Domain
There are a lot of options when choosing a domain, and it doesn’t really matter which provider you will pick. I use www.123-reg.co.uk as my domain provider for BXSS as it only will cost less than one dollar for a first year!
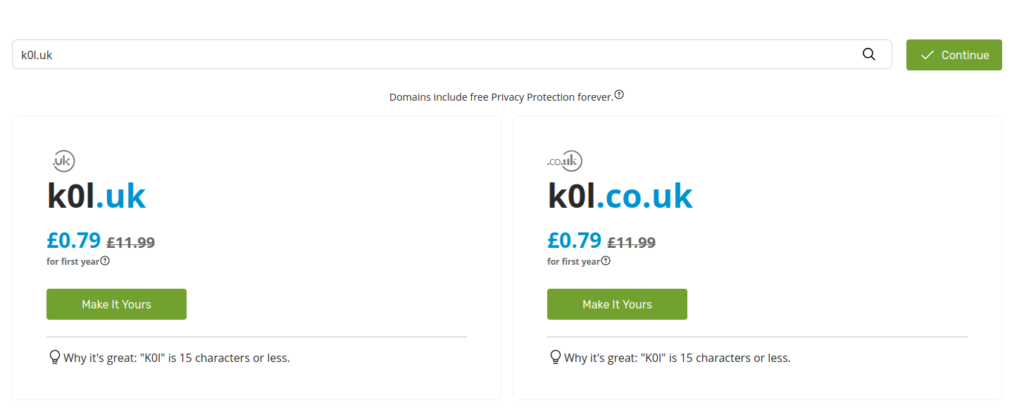
Here’s a helpful tip before you proceed with domain selection — pick the domain name as short as possible. For Top Level Domain (TLD), I highly advise using only 2 letters — in, uk, lv, lt, io and etc. That’s why the www.123-reg.co.uk is a good option for those considering uk TLD. As for the second-level domain, aim for something that’s three characters long, since domains with one or two characters are often already taken or can be extremely expensive! As in this case, the end result contains 6 characters – k0l.uk. I recommend doing this because there will be some cases when your final XSS payload might need to fit into fields with a character limit, possibly as few as 20 characters or less!
For those interested in constructing compact XSS payloads, I highly recommend exploring Jakob Pannington’s work on Minifying XSS and terjanq’s repository of Tiny-XSS-Payloads. These resources offer valuable insights and examples for creating efficient and minimalistic XSS payloads.
Preparing the VPS
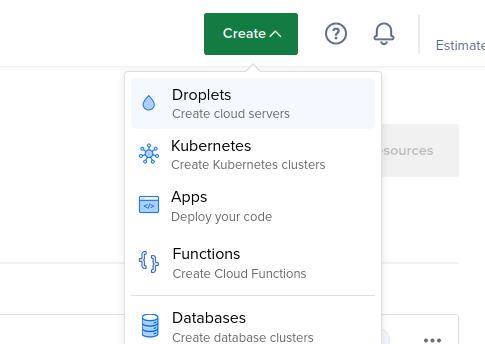
For the Virtual Private Server provider, I tend to use the DigitalOcean, since it is the most reliable option when it comes to bug bounties. Once again, you could use my link, to get some free $200 credits!
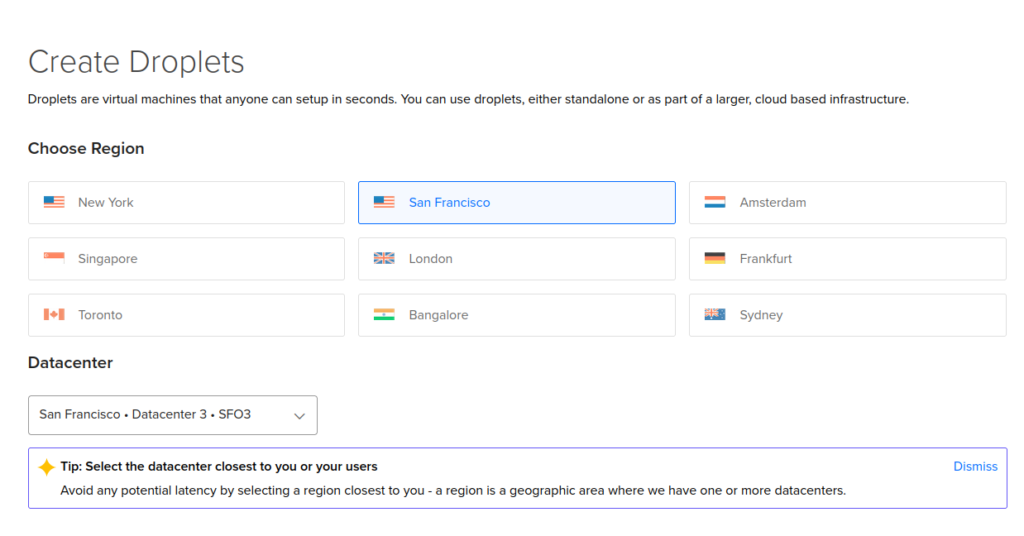
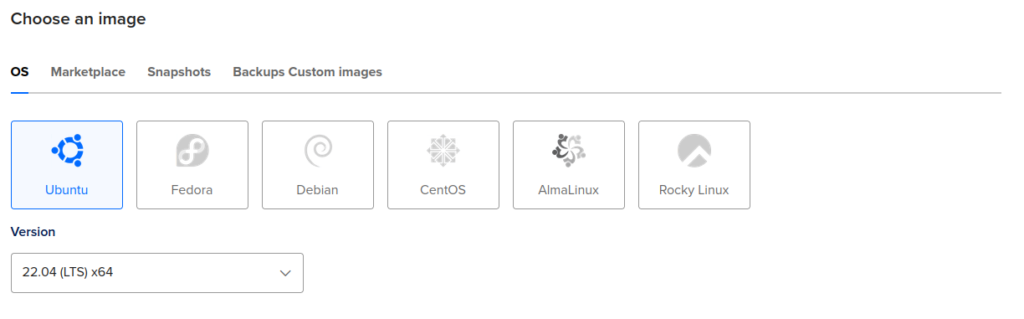
According to the original XSSHunter Express docs, the Host with at least 2 GB of RAM is the minimal system requirement. My own suggestion is to use 4 GB of RAM server with 2 core CPU, and 120 GB of disk space to add more reliability. You could use that same server for other stuff to save some money on monthly bills. Follow those steps on DO to achieve this:

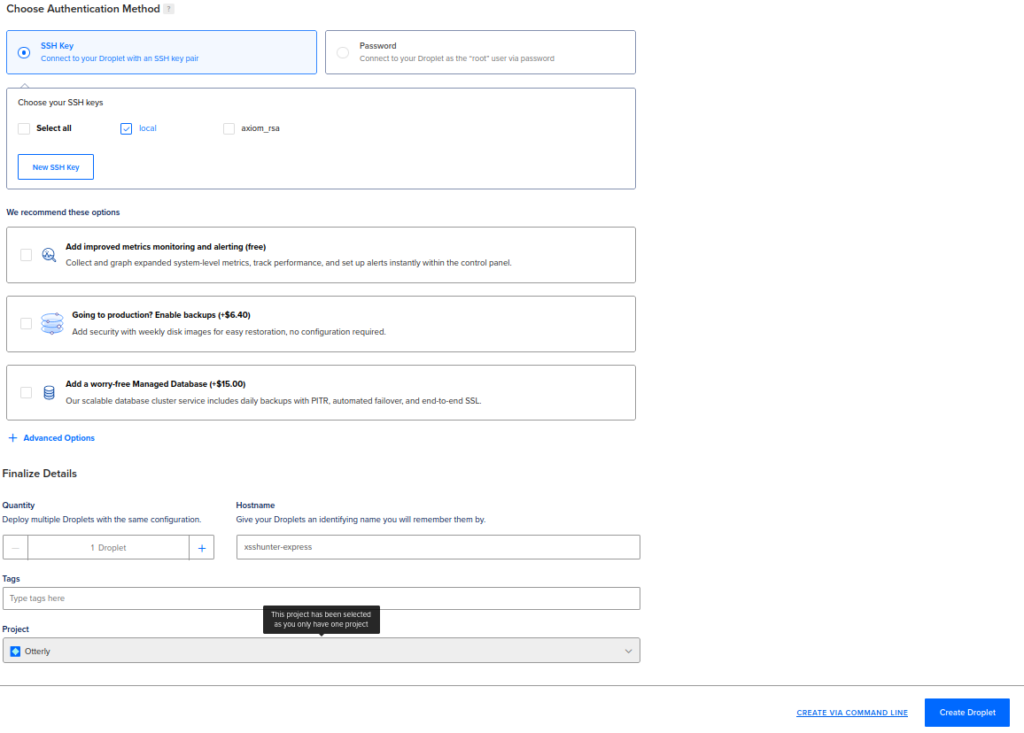
Next, add your own ssh key and give name for your droplet and click on “Create Droplet” button down below:
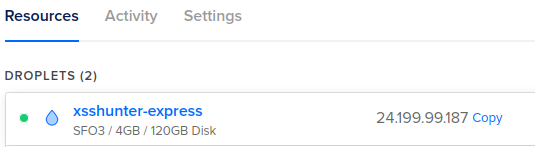
It will take up to a couple of minutes for the droplet to fully initialize. Once it finishes, click on the IP to copy and SSH into the newly created machine:

Configuring the Domain to Match VPS
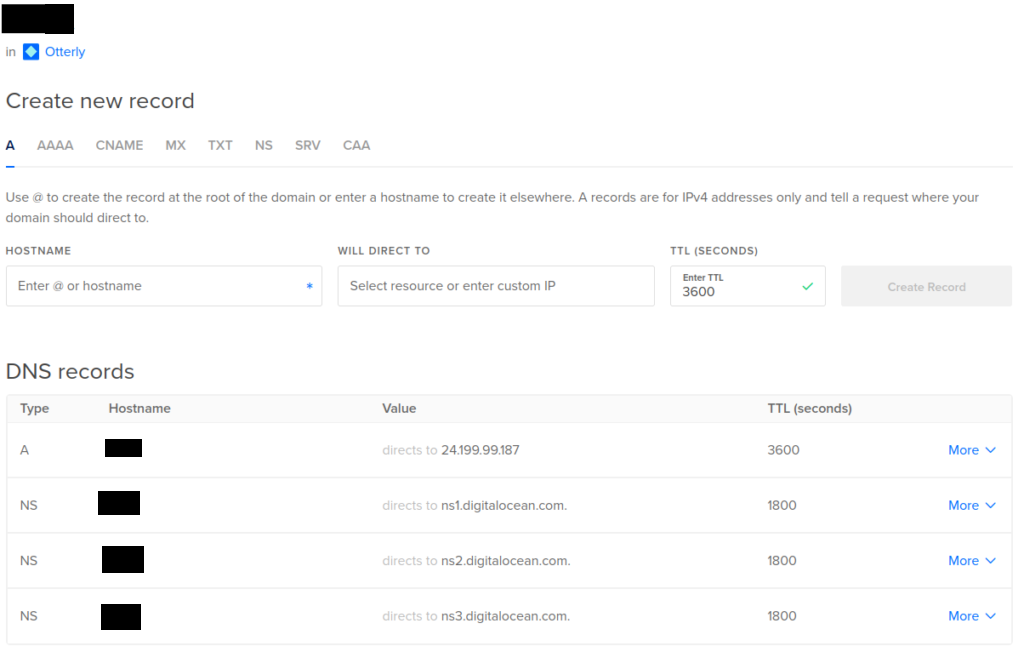
You will be almost ready to install the framework, but need to configure your newly purchased domain to point to your newly created VPS. Depending on your domain provider, it will be a different case each time, so you could watch the official video of DigitalOcean on how to do this. My specific Domain settings on DO looks like this:
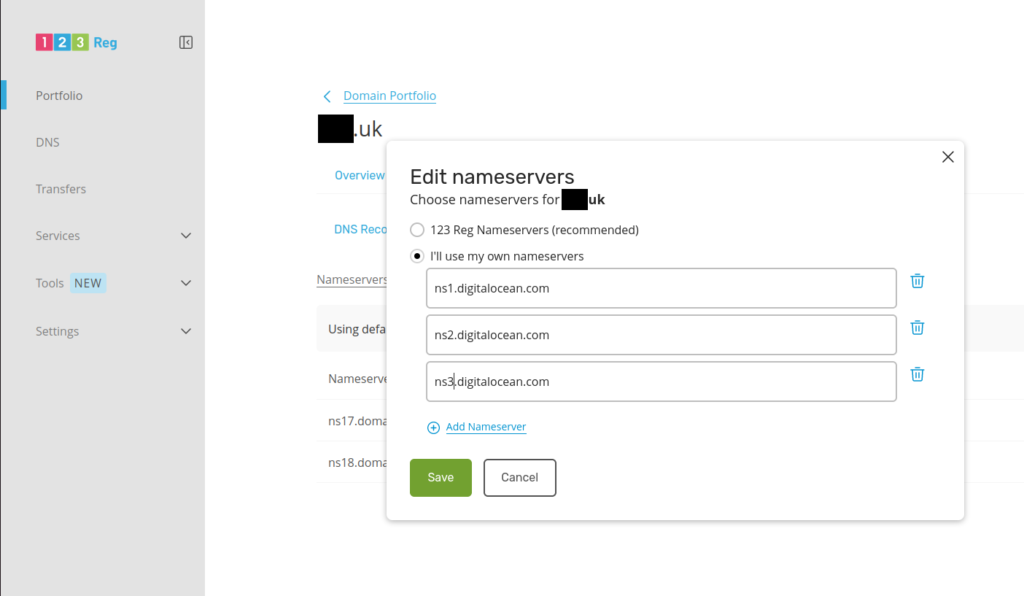
From the www.123-reg.co.uk side, I have also configured the nameservers:
Installing XSSHunter Express
If you did all the prerequisites, you will be finally ready to install Blind XSS Framework. It is pretty straight forward, you will just need to execute these commands on VPS:
Open ports 80 and 443:
ufw allow 80 && ufw allow 443Install docker:
apt install docker.io -yInstall docker-compose:
curl -L "https://github.com/docker/compose/releases/download/1.29.2/docker-compose-$(uname -s)-$(uname -m)" -o /usr/local/bin/docker-compose && chmod +x /usr/local/bin/docker-composeInstall xsshunter-express:
git clone https://github.com/mandatoryprogrammer/xsshunter-express && cd xsshunter-expressEdit the docker-compose.yml configuration file:
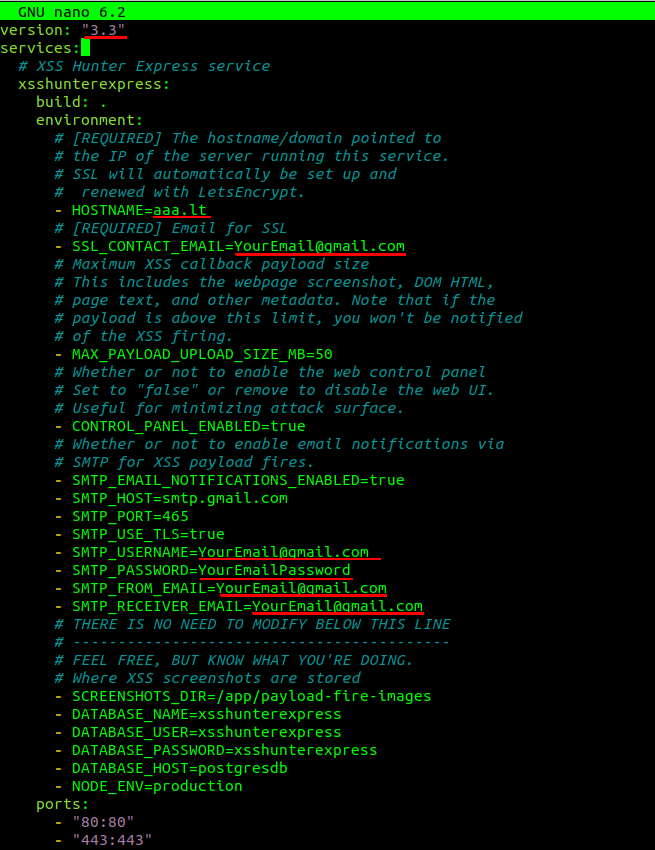
Change version to 3.3, hostname to your purchased domain and your google SMTP settings where you want to received email. You can find the details how to setup Gmail SMTP server here.
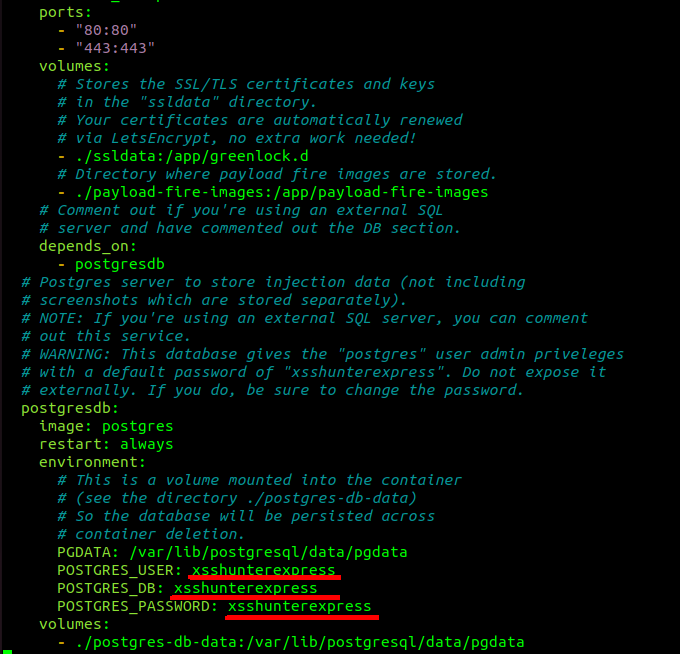
Changing other configuration settings is optional, but good security practice:
Next, run the following commands to finish the installation:
docker-compose up -d postgresdbdocker-compose up xsshunterexpressDepending on your internet speed, it should take about 5–10 minutes for this to setup. After completion, you will get the password output to your screen:
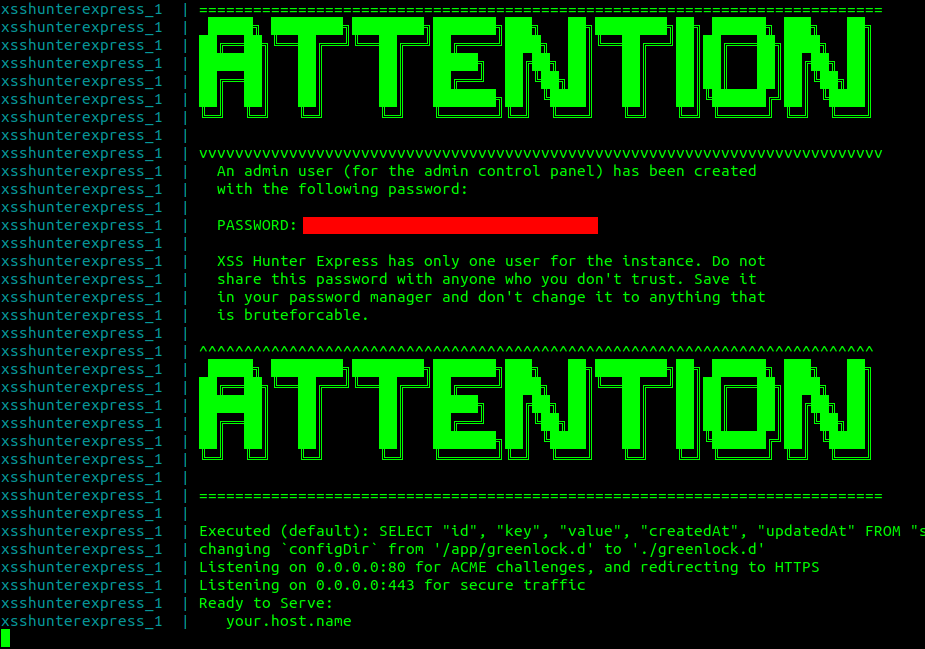
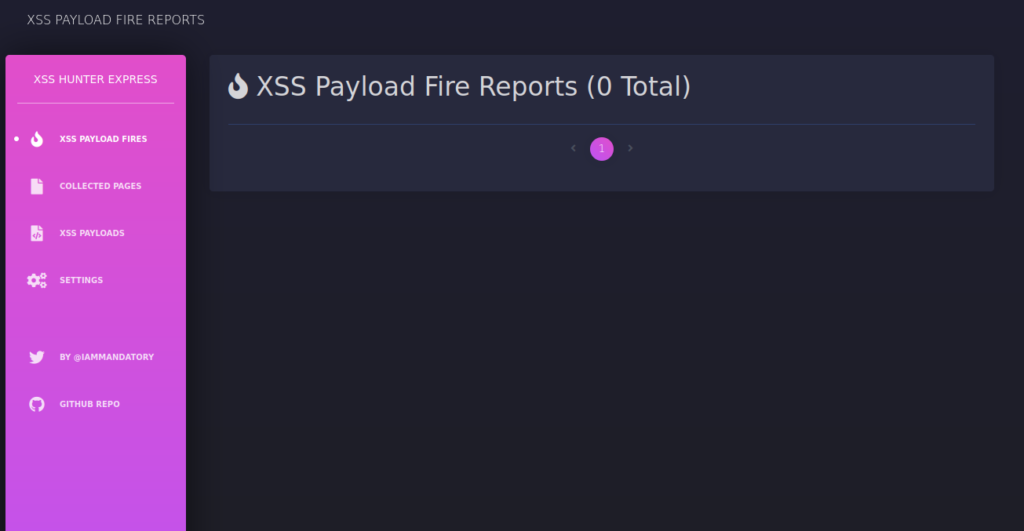
Next, go to yourdomain.uk/admin to login to your XSS Hunter Express dashboard:

Adding Custom JavaScript to BXSS Server
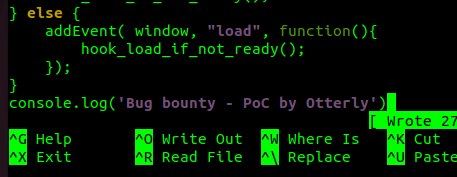
This is a crucial part, so pay the most attention here. There will be some cases when you will want to simplify the triage process. To validate your finding faster, I do recommend having a custom JS function at the end of the remote Blind Cross-Site Scripting server. The JS script will trigger instantly, as the triage team reaches a vulnerable page. It will save both your and validators time, since they won’t need to setup any BXSS server themselves. Also, I recommend to use console.log() function, since it will be less annoying in case an employee reaches the vulnerable page, and less likely under WAFs radar.
So once your xsshunter-express server is running, you should open another terminal and check for docker processes:
docker psCopy the CONTAINER ID of xsshunter-express container and run following command:
docker exec -it <mycontainer> /bin/bashWhen you are inside the container, you will want to append your custom JS command to probe.js file inside ~/app directory:
echo 'console.log("Bug Bounty - PoC by <YOUR_USERNAME>")' >> ~/app/probe.jsOnce you’re done this, you will make the triager’s day easier when validating your findings! Remember, if you want higher bounties, you should be helpful and friendly towards the team, since they will decide the amount of payment.
Key takeaways
- Setting up the BXSS server takes time, but totally worth it, since huge bounties are lurking in the shadows.
- When purchasing the domain for a Blind XSS server, use fewer characters as possible. This unlocks the abilities to insert XSS payloads for limited character input locations.
- Modify the existing BXSS framework to your needs, so the triage process could be much faster.
If you followed everything carefully, you have done enough to start hunting on mass scale for Blind XSS. Stay tuned, since in the next article, I will cover the details on how you could automate Blind Cross-Site Scripting on the mass scale!
I am active on Twitter, check out some content I post there daily! If you are interested in video content, check my YouTube. Also, if you want to reach me personally, you can visit my Discord server. Cheers!