
Axiom Bug Bounty Tool Core Functionality

This is the second part of the Axiom Bug Bounty series. In this post, I will discuss the main features of this amazing tool by using it in a real-world example. I will use Yahoo as a target, as many people know, it does have a large scope, so it will be an excellent example of how I could collect a large amount of data very quickly. Use my affiliate link for DigitalOcean to get $200 in credit over 60 days as a start.
Disclaimer
As I have mentioned in a previous post, I do not condone the use of this tool for unethical reasons. Please be professional and follow the program and cloud provider rules. Thank you in advance!
Basic features
Image/Snapshot control
As already covered in Part 1 of the series, the images, or snapshots, will contain the security tools ready to be used once you try to spawn new instances.
You can quickly check the list of images by using the following command:
axiom-images ls

If you have multiple images, you could select one by using:
axiom-images use <image name>

To remove the image:
axiom-images rm <image name>
Initializing instances
After the initial preparation, you are finally ready to start spawning the AXIOM instances:
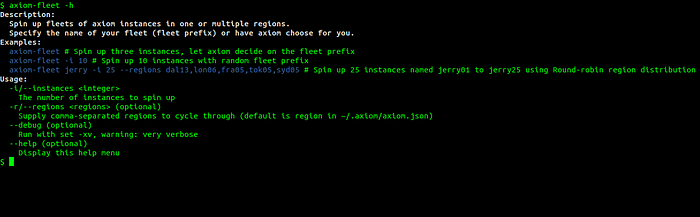
As you can see from the help menu, if you want, you can spin your instances in multiple regions and select the amount. For the sake of simplicity, I will spawn 5 instances without any other options with the name yahoo:
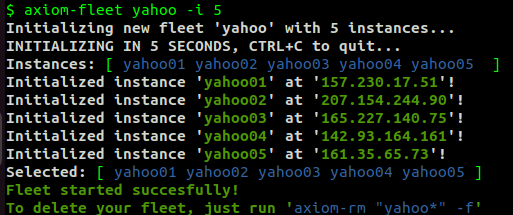
axiom-fleet yahoo -i 5
It will take some time initially, depending on how many instances you want to create. To check spawned instances on DO follow this link:
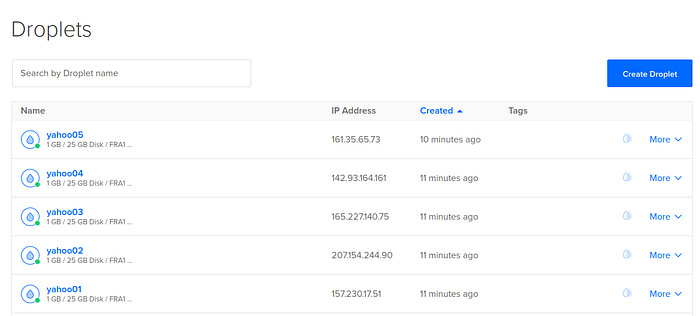
Remember, that there are limitations on your cloud provider. For example, on DigitalOcean you can check your droplet limits here:

If you want to increase the limit of instances on cloud providers, you have to have a valid reason for it. I do recommend getting familiar with the tool for a couple of months, before asking for it.
Make sure not to forget to remove running instances when not using it. It is not even inefficient, but also cost you money. To remove running instances:
axiom-rm "yahoo\*"
Important: DO NOT USE axiom-rm “\*” command if you have some other VPS running on your provider. It could delete it as well, trust me, I learned the hard way…
Distributed scanning
Now it’s time for the core functionality of the Axiom Bug Bounty tool — the axiom-scan feature. This command has many features to customize as you like. I will show 3 examples of how to utilize most of this functionality.
1. Gathering the subdomains passively using amass tool:
axiom-scan domains.txt -m amass --spinup 5 --shutdown-when-done | anew subdomains.txt
- domains.txt — the file wordlist of target root domains.
- -m amass — the tool that will be run on each instance. It is referenced as the module. You can find the list of modules under the ~/.axiom/modules directory. The important thing to mention — you can create your own modules! I will cover this amazing feature in the next part.
- –spinup 5 — this is an optional flag, that allows to creation of instances for this specific scan.
- —shutdown-when-done — usually used with the previous flag, for removing the instances after completing the scans.
Tip: If possible, try to avoid using —spinup and –shutdown-when-done flags, especially if you consider automating with a scheduler like cron. I’ve had some problems destroying the instances automatically, so be cautious. Check if those instances were destroyed on the cloud provider side from time to time. I typically do not use those two flags, this was just an example to show what functionality Axiom has.
2. Brute forcing the subdomains of a single target using puredns:
axiom-scan target-domain.txt -m puredns-bruteforce --max-runtime 30m -wD /path/to/your/local/wordlist/dns.txt
- target-domain.txt — the text file with only one domain as target.
- –max-runtime 30m — this will set maximum time the scan could run. You could use ‘s’ for seconds (the default), ‘m’ for minutes, ‘h’ for hours or ‘d’ for days.
- -wD /path/to/your/local/wordlist/dns.txt — distributes your selected wordlist in the same chunks to your selected instances.
Tip: Sometimes the wordlist is very large and every time you use wordlist split and distribution across all the instances it will consume too much time. I do recommend having a snapshot of an instance with the selected wordlist already inside it.
3. Bruteforcing the subdomains of multiple targets using puredns:
axiom-scan domains.txt -m puredns-bruteforce -w /home/op/lists/seclists/Discovery/DNS/dns-Jhaddix.txt
- -w /home/op/lists/seclists/Discovery/DNS/dns-Jhaddix.txt — in this case, it will use the wordlist already present on each instance.
Congrats, you have successfully launched your first distributed scans of Axiom Bug Bounty tool! Now you are probably wondering how you could navigate to your instances, execute custom commands, take a snapshot of them to use later, or upload your own custom wordlists and tools? Get ready, since I will be covering these features in the next part!
I am active on Twitter, check out some content I post there daily! If you are interested in video content, check my YouTube. Also, if you want to reach me personally, you can visit my Discord server. Cheers!